What is mead?
At its simplest mead happens when you:
- Make a must by mixing water with honey together
- Add yeast
- Wait
Generally the result is described as a wine made from honey.

Yeast
There are many varieties of yeast to choose from. Yeasts are rated on a number of qualities such as temperature range, approximate alcohol tolerance, and flocculation (how easily it clarifies when fermentation is finished).
Two of the most popular yeasts in mead making circles are Lalvin 71B-1122 and Lalvin ICV D-47; one of the most used yeasts in general is Lalvin EC-1118:
D-47 - Is great for drier traditional meads as it is known for producing a nice mouthfeel. The main drawback is that it works best if fermentation temperatures are below 68ºF (20ºC). It is also thought to have higher nutrient requirements.
71B - Works very well in melomels (mead made with fruit) due to its ability to metabolize maltic acid found in fruits. This quality helps produce smooth results. With 71B It's more important to rack off the lees (dead yeast) in a timely fashion than with other yeasts.
1118 - At some of the wine making supply shops around me this is the only yeast sold. It provides an aggressive fermentation, has a very high alcohol tolerance, wide temperature range and low nutrient requirements. On the downside, some feel it is more likely to blow off the subtle honey flavours and aromas. If you don't want a dry mead, it's likely you will need to back sweeten (adding more honey after fermentation stops).
K1 (V1116) - This one is really nice as it has the positive qualities of the 1118 but also seems to produce a nice, fuller mouthfeel.
Water
The water you use will impart it's character into the mead. Some like to use spring water. My filtered tap water seems to work well. Filtering can be important If your water source is chlorinated.
Honey
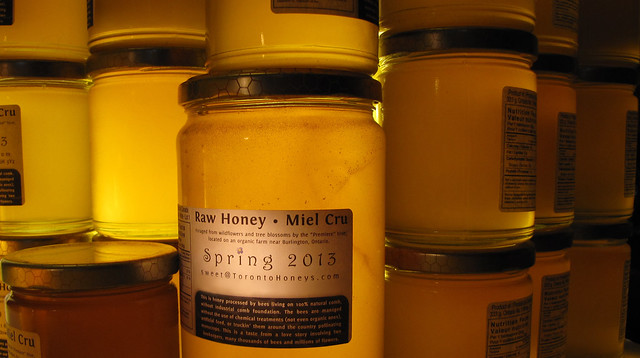
The number one rule to remember about honey is that it should not be heated and doesn't need to be sterilized. Heating destroys the subtle flavours and aromas of your honey. As this is a more recently adopted convention in mead making, you will still come across instructions, that should be ignored, advising you to boil your honey. At most, mix crystallized honey in warmer water to ease the process of dissolving it.
The variety of honey used will certainly impact the character of your end product. Delicately flavoured mono-floral varieties like clover, tupelo, raspberry, and orange blossom are known to be popular in mead making circles, yet some do add varying amounts of the robust flavoured honeys like heather and buckwheat in their recipes.
If you know you have a nice wild flower honey you can work with that too. I believe wildflower honeys are not promoted as much by mead makers developing recipes to reuse and share as wildflower honey can vary tremendously depending on the region and season.
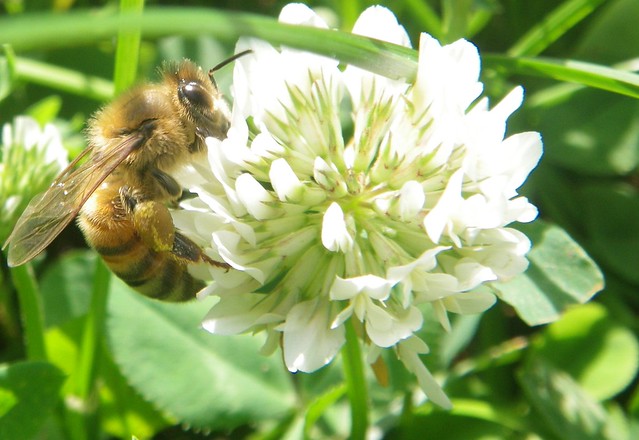
Mazers generally advise to use the highest quality honey for mead, but as a beekeeper you may occasionally end up with honey that has a high-moisture content, and it may even have started fermenting on its own. If you can't do much else with it, why not see what happens when you brew with it? I've also had some interesting results using the sweetened water left over from wax rendering as part of a mead recipe.

Hydrometer
This is used to measure the specific gravity (SG) of your mead. The reading tells you how much sugar you have mixed into your must. Based on the start number, you can later work out the alcohol percentage of your mead by taking another reading when fermentation is finished.
There is a handy online mead calculator available here. The calculator can help you to estimate things like how much honey is needed to achieve a desired SG or your final alcohol content.
Honey to water ratio
Lower proportions of honey mean less potential alcohol, but there's also less osmotic pressure. This means it's a bit easier for the yeast to work its magic. Higher alcohol meads also often require a longer aging period.
For a medium strength mead, 2.5 - 3 lb of honey added to 1 gallon of water typically works out to an SG between 1.075 and 1.086 and the potential for around 10-11.5% alcohol by volume. As a mead hits 10% alcohol, it should be reasonably resistant against many of the things that could potential infect a brew. Once you start adding more than 4.25 lb honey per gallon, you might need to pay a little bit more attention to the finer details in order to achieve a successful fermentation as this amount of sugar puts a lot more pressure on the yeast.
Nutrients
Unfortunately, honey alone is low in some key nutrients, like nitrogen, that help yeast to thrive. Most brew shops carry yeast nutrients, like DAP, and energizers such as Fermaid-k. Natural alternatives to these products include adding raisins or pollen to the recipe.
I've made one side by side comparison of the same recipe made with pollen versus the commercial nutrient products. In my test I observed a far more vigorous fermentation with the batch using pollen. Of course, pollen may impart some of its flavour into the mead which may or may not be desirable. Personally, I did not find the pollen impact on flavour to be all that obvious in my experiment. The other potential drawback of this method is that it can take a large amount of pollen to reach the needed nutrient levels.
Carboy
This is the container you're going to brew your mead in. Ideally you have at least one larger container and one smaller container. For the primary initial fermentation it's ideal to have a bunch of extra space. Extra space makes it easier to shake it up. It also keeps particularly vigorous fermentations from bubbling over.
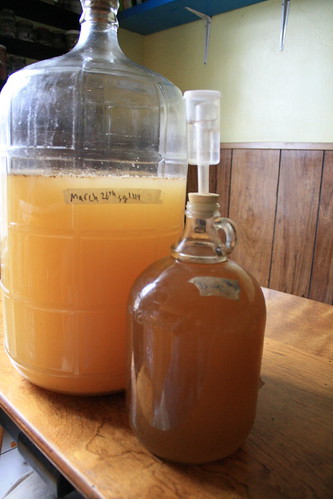
The other reason why it's nice to have two different sized containers is that it's ideal to have very little air space in the container once the fermentation is finished. A larger container for the primary fermentation allows you to brew a little extra you so you don't need to worry about the volume of liquid lost when:
- Racking your mead off of the dead lees (spent yeast that accumulated on the bottom); or
- Performing the requisite taste tests.
Air lock
Simple little tool that blocks the carboy opening. It is filled with water to allow gas from the fermenting liquid to bubble out while preventing potential contaminants from entering.
Oxygen
In the early stages of the fermentation, oxygen in the liquid helps promote strong yeast development. To this end, I'll vigorously shake the carboy for the first 3 or 4 days. I'll do this as many times a day as it occurs to me. For large batches of mead (5 gallons or more) you may want to look into tools that can help you do this.
To help increase oxygen levels, many people don't bother with an air lock during the primary fermentation. They will simply cover the opening with a piece of foil or cloth.
Racking
This is the process of moving your mead from one container to another. The main purpose is to separate your precious mead from the yeast that has served its purpose and is starting to accumulate at the bottom of the carboy.
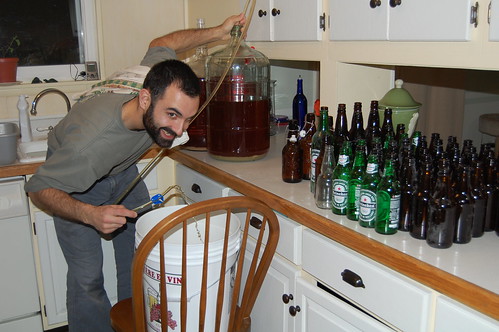
A popsicle stick attached to the end of your siphon tube or a tube opening cut at a sharp angle can reduce the risk of sucking up liquid from the very bottom. In the new container into which you are moving your mead, have your siphon tube rest at the very bottom so as to minimize splashing and any oxidization.
There are a number of gadgets, like the auto siphon, that make the process a whole lot simpler, but it is possible to do this with just a plain old tube.
You may want to rack again as the mead continues to clarify and another thick layer of yeast accumulates at the bottom of the carboy. It is desirable for your mead to eventually become crystal clear.
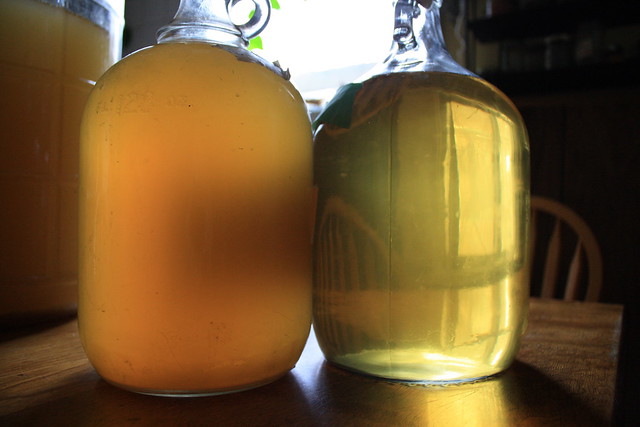
Some find the simple act of racking will greatly accelerate clarification. Exposing your mead to a sudden drop of temperature for a number of days can also help the yeast to drop. There are also fast acting commercial products designed specifically for this purpose.
Temperature
The temperature at which to ferment is somewhat yeast specific, as they all have slightly different tolerances and reactions to temperature. It's typically best to ferment at the lower end of a yeast's tolerance range. At warmer fermentation temperatures:
- You are more likely to get fusel alcohols, which impart a harsh burning flavour.
- You may lose the subtle volatile honey flavours and aromas.
I'm often aiming for a fermentation temperature around 17°c (63°F). To accommodate this I'm typically making my meads in a cool basement once the beekeeping season has finished in the late fall. If you don't have any choice, you can usually do fine with room temperature, particularly with more heat tolerant yeasts.
When aging mead, storing at cooler temperatures is also a good idea if possible.
Sanitizer
There's a wide variety of products out there that will sanitize your carboy and any other equipment that is going to come in contact with your must or mead. A no-rinse sanitizer is considered ideal as rinsing with non-sterilized water can re-introduce contaminants. Star San is the first choice of many brewers.
It's sold in a concentrated form and is diluted with water before use. The diluted solution can be stored in a sealed container for months. Materials to be sanitized can be rinsed, soaked or sprayed with the solution. After about two minutes of being wet, any excess liquids can be poured off and the items are ready for use.
Dry, sweet and back sweetening
Yeasts are rated for alcohol tolerance, but if treated well, they will often go a little beyond their ratings. For example both D47 and 71B are rated with an alcohol tolerance of 14%, but they might go to 15-16%. If you want a dry mead using those yeasts, simply mix a must with a gravity that corresponds to a potential alcohol content of 14% or less.
Getting a sweet mead can be a bit more complicated. If you mix your must with enough honey to still be sweet if the yeast does reach 16% alcohol, you've created a more challenging environment for the yeast and maybe it won't make it very far at all. This makes it difficult to plan on ending up with a particular amount of sweetness. The solution to this problem is back sweetening.
Back sweetening involves adding honey at the end of fermentation to reach your desired sweetness level. Just make sure the yeast has reached its tolerance limit before adding more honey, or use stabilizing products to prevent fermentation from starting up again.
Tannins and acids
Tannins and acids can be used to help improve the mouthfeel of your beverage and can help balance out the flavour.
Oak is one way to add to the tannin levels of your beverage. Brew shops carry a variety of oak cubes and chips. A little can go a long way, so be cautious about over-oaking. Though the oak flavour will mellow a bit with age, I like to keep it subtle and taste every few days or so to keep it at a level I find pleasant.
I've found 1 gram of medium toast oak cubes or 0.5 grams of oak chips added in for 3-5 days before racking can be enough for my tastes. Some will recommend larger quantities and longer time with oak.
Acids work particularly well at adding balance to sweeter wines. Once upon a time it was commonly recommended to add acids at the start of fermentation to correct PH levels, while today many argue it should not be added till the end. Unless the PH of your must is above 5-6, which isn't very likely, you probably shouldn't worry about it at all. My tendency is to not even bother measuring PH.
Aging
Time required to get something tasty does vary depending on many factors, but generally mazers agree that things, sometimes even unpleasant things, get better with age. If you created an ideal environment for yeast to work their magic, and particularly if you make something with a lower alcohol level and a higher final sugar content, you can be enjoying your beverage in as soon as three months. On the other end of the spectrum, a 14 year old mead is the most awe inspiring beverages I have ever tasted.
Further Resources
Ken Schramm's 'The Compleat Meadmaker' is one of the most widely respected books on modern mead making.
You can hear him talk mead making in the following episode from The Jamil Show starting at about the 7 minute mark.


