I used two crushed combs from a warré to make a small candle in an improvised solar melter. Here's a quick overview of the process:
Materials
A couple of discarded waxed paper coffee cups, an appropriate sized candle wick, a small cooler, a window, a few small sticks, a small piece of cloth or old window screen, a black garbage bag, and an elastic.
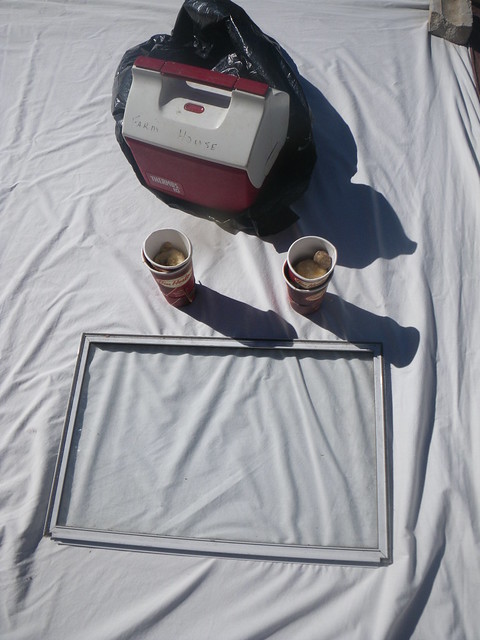 Photo by: Shawn Caza / CC: Attribution-NonCommercial-ShareAlike License
Separate the wax from the remaining honey
The first melting is all about trying to make your wax as pure as possible.
-
Cut the bottom out of coffee cup A.
-
Place cloth on the bottom of cup A with an elastic.
-
Poke small holes in the sides of cup B above the estimated needed wax capacity and slide a small stick into the holes.
-
Rest cup A full of wax on top of the stick inside of cup B.
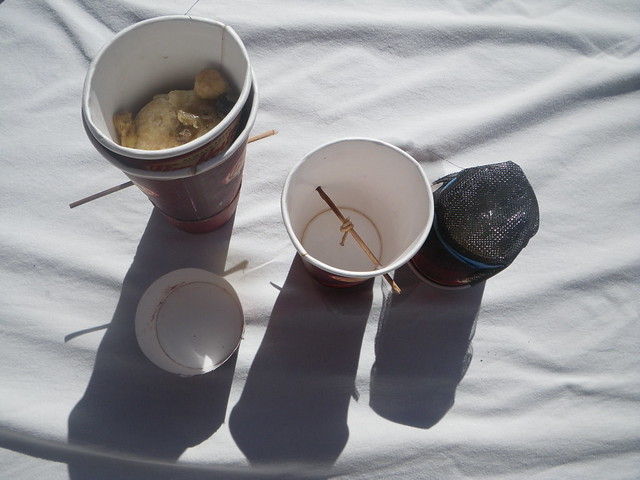 Photo by: Shawn Caza / CC: Attribution-NonCommercial-ShareAlike License
 Photo by: Shawn Caza / CC: Attribution-NonCommercial-ShareAlike License
The cloth should keep most propolis and debris in the top cup.
 Photo by: Shawn Caza / CC: Attribution-NonCommercial-ShareAlike License
Once cooled all the wax will float to the top with the honey on the bottom of cup B. Though I crushed the comb and let it strain for over a week I was surprised to see there was still more honey than wax left after melting. This photo shows how much of each I ended up with:
 Photo by: Shawn Caza / CC: Attribution-NonCommercial-ShareAlike License
Making the candle
I make the candle following a similar process as described above except a wick is added. Using the right sized wick for the size of the coffee cup is essential for the candle to burn properly.
-
This time a small hole is made in the centre of the bottom of cup b.
-
Thread the wick through the hole and use a knot to keep the end from passing through the hole.
-
You can use an additional cup to catch any wax that might pass through this hole, but if you keep the hole tight and keep the wick knot snug against it, the wax will not drip through.
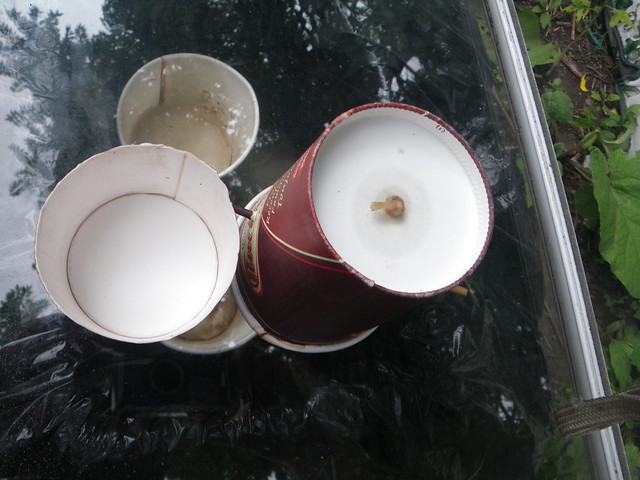 Photo by: Shawn Caza / CC: Attribution-NonCommercial-ShareAlike License
Once the wax has all melted into cup b allow the wax to cool slowly. If it cools to quickly the wax may crack. Then rip the cup away from the wax.
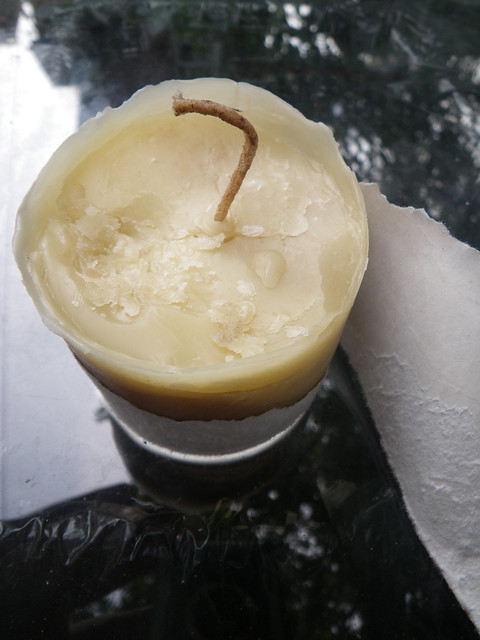 Photo by: Shawn Caza / CC: Attribution-NonCommercial-ShareAlike License
Trim the wick as necessary.
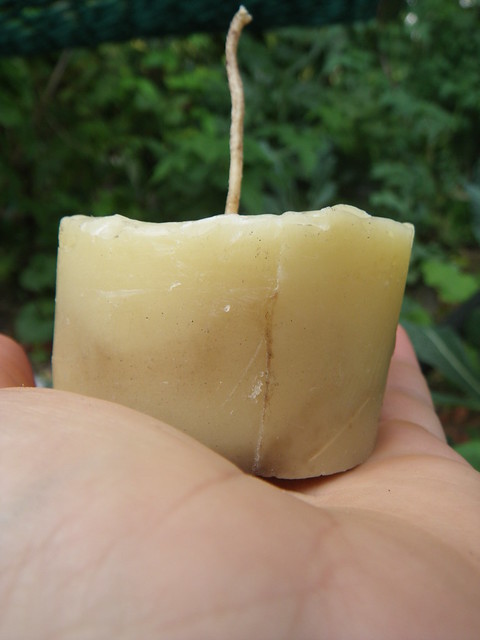 Photo by: Shawn Caza / CC: Attribution-NonCommercial-ShareAlike License
Enjoy your candle.
 Photo by: Shawn Caza / CC: Attribution-NonCommercial-ShareAlike License
People use all sorts of things to filter their wax. The cleaner you can get it the better it will burn. A doubled up window screen might give you a working candle if your wax is fairly clean to begin with, but a cotton cloth or paper towel will result in a candle that burns brighter. The below photo shows the difference in in brightness between candles made with different degrees of filtering.
 Photo by: Shawn Caza / CC: Attribution-NonCommercial-ShareAlike License


