What is mead?

At its simplest mead happens when you:

  1. Make a must by mixing water with honey together
  2. Add yeast
  3. Wait

Generally the result is described as a wine made from honey.
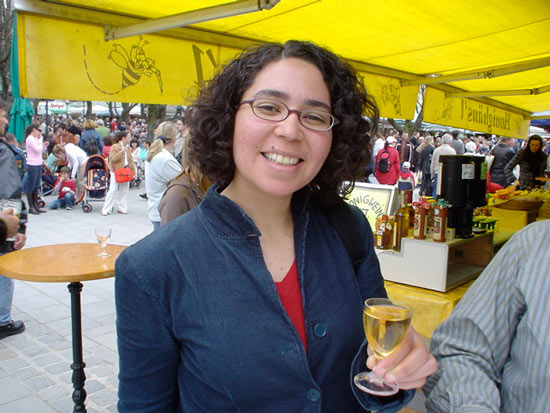
Sampling a glass of mead
Sampling honey wine at the Viktualienmarkt in Munich. Photo by Celeste Hutchins [CC BY
For my first few attempts at homemade mead I didn't do much more than the instructions listed above. I ended up with drinkable results and was able to call myself a mazer (one who brews mead). Since then I've tried to up the quality of my brews. The following is a quick overview of some of the fundamentals I wish I had learned earlier.

Various fermentation vessels. By ArnOlson, via Wikimedia Commons

Yeast

There are many varieties of yeast to choose from. Yeasts are rated on a number of qualities such as temperature range, approximate alcohol tolerance, and flocculation (how easily it clarifies when fermentation is finished).

Two of the most popular yeasts in mead making circles are Lalvin 71B-1122 and Lalvin ICV D-47; one of the most used yeasts in general is Lalvin EC-1118:

D-47 - Is great for drier traditional meads as it is known for producing a nice mouthfeel. The main drawback is that it works best if fermentation temperatures are below 68ºF (20ºC). It is also thought to have higher nutrient requirements.

71B - Works very well in melomels (mead made with fruit) due to its ability to metabolize maltic acid found in fruits. This quality helps produce smooth results. With 71B It's more important to rack off the lees (dead yeast) in a timely fashion than with other yeasts.

1118 - At some of the wine making supply shops around me this is the only yeast sold. It provides an aggressive fermentation, has a very high alcohol tolerance, wide temperature range and low nutrient requirements. On the downside, some feel it is more likely to blow off the subtle honey flavours and aromas. If you don't want a dry mead, it's likely you will need to back sweeten (adding more honey after fermentation stops).

K1 (V1116) - This one is really nice as it has the positive qualities of the 1118 but also seems to produce a nice, fuller mouthfeel.

Tips. A typical 5g packet of yeast will usually state that it's good for a 5 gallon brew, however, I would suggest using 2 packets if you will be brewing more than 3.5 gallons or using a recipe with a higher proportion of honey. Another option for increasing your yeast population is to create a yeast starter.

Water

The water you use will impart it's character into the mead. Some like to use spring water. My filtered tap water seems to work well. Filtering can be important If your water source is chlorinated.

Honey

The number one rule to remember about honey is that it should not be heated and doesn't need to be sterilized. Heating destroys the subtle flavours and aromas of your honey. As this is a more recently adopted convention in mead making, you will still come across instructions, that should be ignored, advising you to boil your honey. At most, mix crystallized honey in warmer water to ease the process of dissolving it.

The variety of honey used will certainly impact the character of your end product. Delicately flavoured mono-floral varieties like clover, tupelo, raspberry, and orange blossom are known to be popular in mead making circles, yet some do add varying amounts of the robust flavoured honeys like heather and buckwheat in their recipes.

If you know you have a nice wild flower honey you can work with that too. I believe wildflower honeys are not promoted as much by mead makers developing recipes to reuse and share as wildflower honey can vary tremendously depending on the region and season.
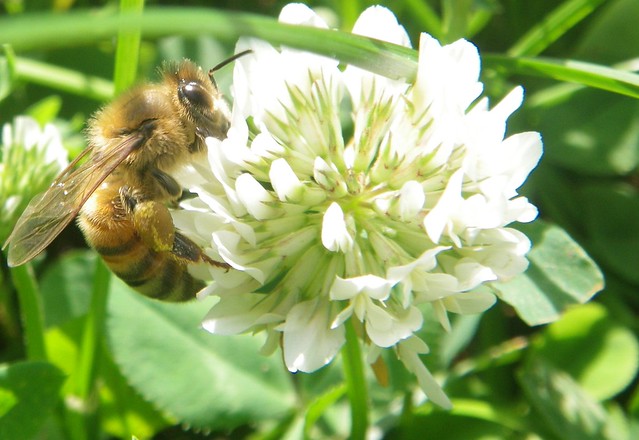
Note: Keep in mind it's often felt that the stronger flavoured honeys take longer to age in a mead.
Honeybee on clover blossom. By Shawn Caza, via Flickr.

Mazers generally advise to use the highest quality honey for mead, but as a beekeeper you may occasionally end up with honey that has a high-moisture content, and it may even have started fermenting on its own. If you can't do much else with it, why not see what happens when you brew with it? I've also had some interesting results using the sweetened water left over from wax rendering as part of a mead recipe.

Taking a reading with a hydrometer. By Schlemazl [CC BY-SA], via Wikimedia Commons

Hydrometer

This is used to measure the specific gravity (SG) of your mead. The reading tells you how much sugar you have mixed into your must. Based on the start number, you can later work out the alcohol percentage of your mead by taking another reading when fermentation is finished.

There is a handy online mead calculator available here. The calculator can help you to estimate things like how much honey is needed to achieve a desired SG or your final alcohol content.

Honey to water ratio

Lower proportions of honey mean less potential alcohol, but there's also less osmotic pressure. This means it's a bit easier for the yeast to work its magic. Higher alcohol meads also often require a longer aging period.

For a medium strength mead, 2.5 - 3 lb of honey added to 1 gallon of water typically works out to an SG between 1.075 and 1.086 and the potential for around 10-11.5% alcohol by volume. As a mead hits 10% alcohol, it should be reasonably resistant against many of the things that could potential infect a brew. Once you start adding more than 4.25 lb honey per gallon, you might need to pay a little bit more attention to the finer details in order to achieve a successful fermentation as this amount of sugar puts a lot more pressure on the yeast.

Nutrients

Unfortunately, honey alone is low in some key nutrients, like nitrogen, that help yeast to thrive. Most brew shops carry yeast nutrients, like DAP, and energizers such as Fermaid-k. Natural alternatives to these products include adding raisins or pollen to the recipe.

I've made one side by side comparison of the same recipe made with pollen versus the commercial nutrient products. In my test I observed a far more vigorous fermentation with the batch using pollen. Of course, pollen may impart some of its flavour into the mead which may or may not be desirable. Personally, I did not find the pollen impact on flavour to be all that obvious in my experiment. The other potential drawback of this method is that it can take a large amount of pollen to reach the needed nutrient levels.

Tips. Recently, there's been a great deal of thought by mazers poured into staggered nutrient additions in mead making. If you're interested in getting more technical about when and how much to add, here's an article on advanced nutrients in mead making along with a link to a spreadsheet for calculating the appropriate amounts of nutrients to add. If  you want to keep it simple just add all the nutrients at the beginning.

Carboy

This is the container you're going to brew your mead in. Ideally you have at least one larger container and one smaller container. For the primary initial fermentation it's ideal to have a bunch of extra space. Extra space makes it easier to shake it up. It also keeps particularly vigorous fermentations from bubbling over.
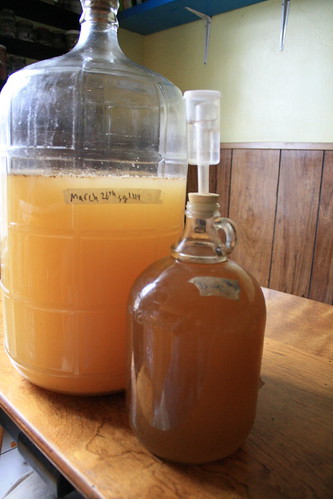
Two carboys. By Shawn Caza, via Flickr

The other reason why it's nice to have two different sized containers is that it's ideal to have very little air space in the container once the fermentation is finished. A larger container for the primary fermentation allows you to brew a little extra you so you don't need to worry about the volume of liquid lost when:

  • Racking your mead off of the dead lees (spent yeast that accumulated on the bottom); or
  • Performing the requisite taste tests.

Air lock

Simple little tool that blocks the carboy opening. It is filled with water to allow gas from the fermenting liquid to bubble out while preventing potential contaminants from entering.

Oxygen

In the early stages of the fermentation, oxygen in the liquid helps promote strong yeast development. To this end, I'll vigorously shake the carboy for the first 3 or 4 days. I'll do this as many times a day as it occurs to me. For large batches of mead (5 gallons or more) you may want to look into tools that can help you do this.

To help increase oxygen levels, many people don't bother with an air lock during the primary fermentation. They will simply cover the opening with a piece of foil or cloth.

Racking

This is the process of moving your mead from one container to another. The main purpose is to separate your precious mead from the yeast that has served its purpose and is starting to accumulate at the bottom of the carboy.
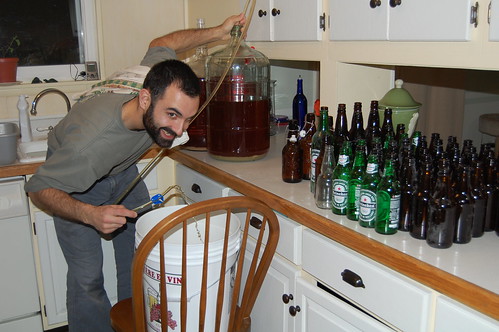
Bottling the brew
Racking mead. By Christine4nier [CC BY-NC], via Flickr
It has been suggested that once the fermentation is nearing completion, gauged by frequency of bubbles in the air lock having slowed down to approximately 1 per 30 seconds, it is a good time to first rack your mead. The idea is that allowing the end stage of fermentation to take place in the new vessel will help push oxygen out of the air lock and prevent oxidization.

Caution. Remember, your main goal is to separate the liquid from as much of the yeast guck as possible. Don't try to save the liquid too close to the bottom.

A popsicle stick attached to the end of your siphon tube or a tube opening cut at a sharp angle can reduce the risk of sucking up liquid from the very bottom. In the new container into which you are moving your mead, have your siphon tube rest at the very bottom so as to minimize splashing and any oxidization.

There are a number of gadgets, like the auto siphon, that make the process a whole lot simpler, but it is possible to do this with just a plain old tube.

You may want to rack again as the mead continues to clarify and another thick layer of yeast accumulates at the bottom of the carboy. It is desirable for your mead to eventually become crystal clear.
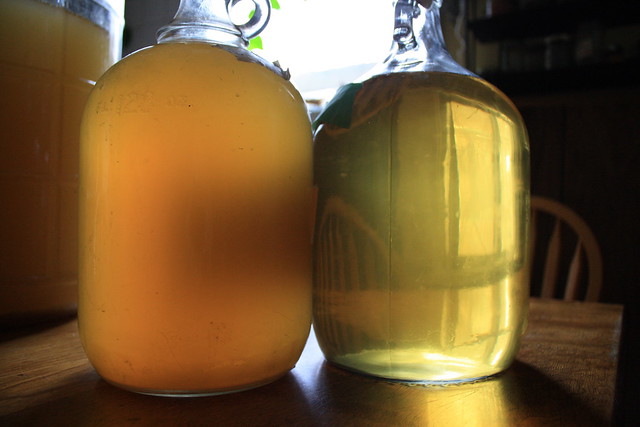
Cloudy mead on the left beside a clear mead on the right. By Shawn Caza, via Flickr.

Some find the simple act of racking will greatly accelerate clarification. Exposing your mead to a sudden drop of temperature for a number of days can also help the yeast to drop. There are also fast acting commercial products designed specifically for this purpose.

Temperature

The temperature at which to ferment is somewhat yeast specific, as they all have slightly different tolerances and reactions to temperature. It's typically best to ferment at the lower end of a yeast's tolerance range. At warmer fermentation temperatures:

  • You are more likely to get fusel alcohols, which impart a harsh burning flavour.
  • You may lose the subtle volatile honey flavours and aromas.

I'm often aiming for a fermentation temperature around 17°c (63°F). To accommodate this I'm typically making my meads in a cool basement once the beekeeping season has finished in the late fall. If you don't have any choice, you can usually do fine with room temperature, particularly with more heat tolerant yeasts.

Note: A vigourous fermentation can generate a bit of its own heat and raise your must above ambient temperatures.

When aging mead, storing at cooler temperatures is also a good idea if possible.

Sanitizer

There's a wide variety of products out there that will sanitize your carboy and any other equipment that is going to come in contact with your must or mead. A no-rinse sanitizer is considered ideal as rinsing with non-sterilized water can re-introduce contaminants. Star San is the first choice of many brewers.

It's sold in a concentrated form and is diluted with water before use. The diluted solution can be stored in a sealed container for months. Materials to be sanitized can be rinsed, soaked or sprayed with the solution. After about two minutes of being wet, any excess liquids can be poured off and the items are ready for use.

Note: It will leave a bubbly foam in your carboy, but this should not be a cause for concern. The foam does not adversely effect your mead.

Dry, sweet and back sweetening

Yeasts are rated for alcohol tolerance, but if treated well, they will often go a little beyond their ratings. For example both D47 and 71B are rated with an alcohol tolerance of 14%, but they might go to 15-16%. If you want a dry mead using those yeasts, simply mix a must with a gravity that corresponds to a potential alcohol content of 14% or less.

Getting a sweet mead can be a bit more complicated. If you mix your must with enough honey to still be sweet if the yeast does reach 16% alcohol, you've created a more challenging environment for the yeast and maybe it won't make it very far at all. This makes it difficult to plan on ending up with a particular amount of sweetness. The solution to this problem is back sweetening.

Back sweetening involves adding honey at the end of fermentation to reach your desired sweetness level. Just make sure the yeast has reached its tolerance limit before adding more honey, or use stabilizing products to prevent fermentation from starting up again.

Tannins and acids

Tannins and acids can be used to help improve the mouthfeel of your beverage and can help balance out the flavour.

Oak is one way to add to the tannin levels of your beverage. Brew shops carry a variety of oak cubes and chips. A little can go a long way, so be cautious about over-oaking. Though the oak flavour will mellow a bit with age, I like to keep it subtle and taste every few days or so to keep it at a level I find pleasant.

I've found 1 gram of medium toast oak cubes or 0.5 grams of oak chips added in for 3-5 days before racking can be enough for my tastes. Some will recommend larger quantities and longer time with oak.

Acids work particularly well at adding balance to sweeter wines. Once upon a time it was commonly recommended to add acids at the start of fermentation to correct PH levels, while today many argue it should not be added till the end. Unless the PH of your must is above 5-6, which isn't very likely, you probably shouldn't worry about it at all. My tendency is to not even bother measuring PH.

Aging

Time required to get something tasty does vary depending on many factors, but generally mazers agree that things, sometimes even unpleasant things, get better with age. If you created an ideal environment for yeast to work their magic, and particularly if you make something with a lower alcohol level and a higher final sugar content, you can be enjoying your beverage in as soon as three months. On the other end of the spectrum, a 14 year old mead is the most awe inspiring beverages I have ever tasted.

Further Resources

Ken Schramm's 'The Compleat Meadmaker' is one of the most widely respected books on modern mead making.

You can hear him talk mead making in the following episode from The Jamil Show starting at about the 7 minute mark.

1

Motivation for the removable screened bottom board

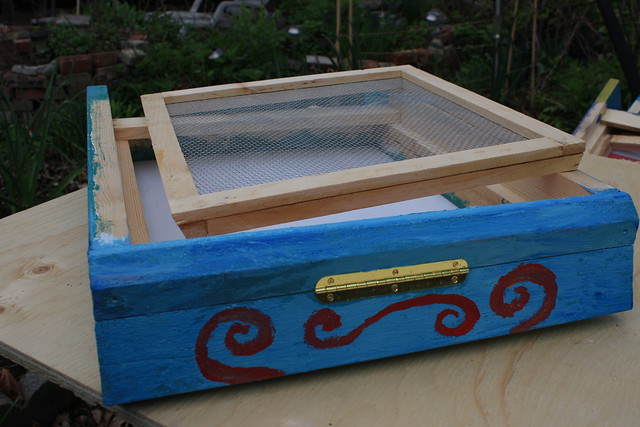
I wanted to make a screened bottom board to facilitate mite monitoring and sugar dusting. I also wanted a bottom board design that allowed more space under the hive for winter. My main motivation for designing this variation of the screened bottom board is so I can clean out dead winter bees with greater ease, and worry less about the bottom entrance getting clogged up with dead bees.

The Screen

Screened frame removed A framed screen was created by gluing together a sandwich of 1/8 inch hardware cloth and wooden slats.

Tips. If you can find it, use stainless steel hardware cloth as it will hold up better to any formic acid exposure that may happen while performing mite treatments. Of course, If all you can find is galvanized, removing the screen during treatments is an option.

Rabbets were cut into the side walls of the bottom board structure to support the screen.

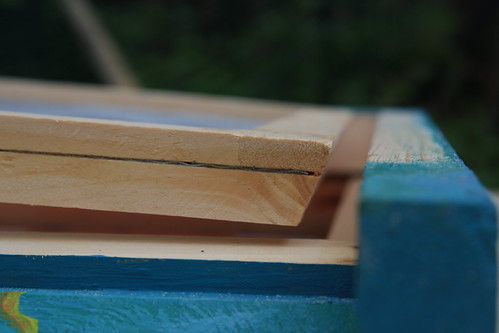
bevel on framed screenInspired by the concepts in Walt Wright's propolis Article, a slight bevel was cut into the sides of the framed screen in the hopes of minimizing the accumulation of propolis between it and the frame rest.

The back of the bottom board

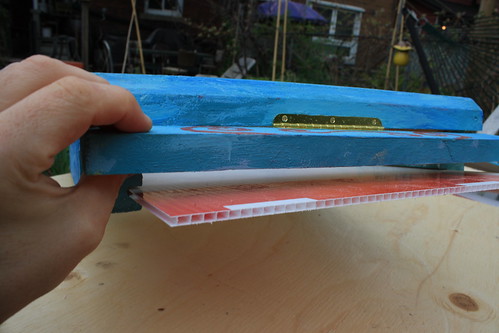
back of bottom board with hinged flap opened.The back of the bottom board is comprised of two pieces of wood:

The top piece:

  • Is screwed in place.
  • Blocks the area containing the screen and the space above it.

The bottom piece:

  • Is hinged to the top piece for the purpose of allowing easy access to the tray when performing mite counts.
  • When closed, it prevents bees, mice and wasps. from accessing the area between the screen and the tray.
Caution. Distance between the screen and the tray is two inches to reduce the possibility of varroa climbing back up into the hive. I've seen references to 1 and 5/8 inches being sufficient, but some say to use two inches. I decided to play it safe.

Bottom view of framed screen.The concept is that during the fall, when winterizing the hive, the screened frame can be removed from the bottom board while all the hive boxes remain in place. My hope is that the screened frame can be pried up from the area inside the hinged flap in order to loosen any propolis. The top portion on the bottom board's back can then be unscrewed and removed to allow the framed screen to slide out. Thus converting the hive to a simple solid bottom board.

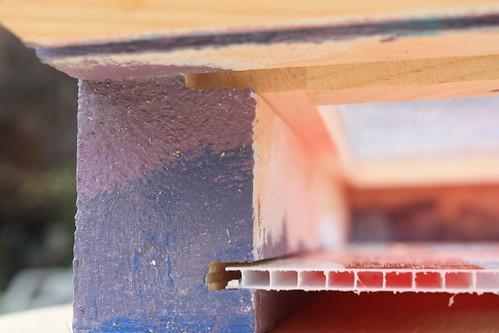
The Tray

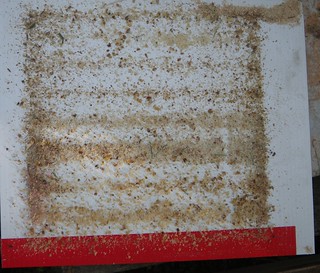
debris on bottom board trayThe tray is just a simple piece of corflute that slides into a groove in the side walls. I run eight frames to a box. The above photo shows the screened area is large enough to allow debris and varroa to fall through from spaces between and around all eight combs.

Entrance

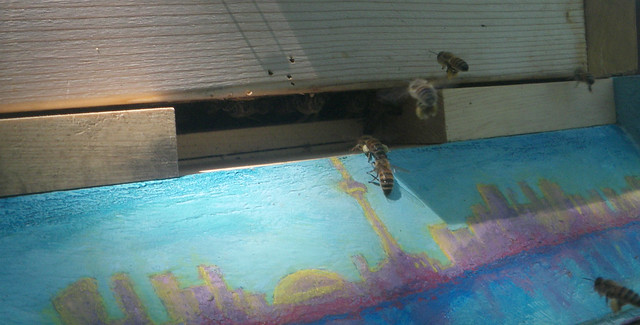
Entrance with reducers in placeThe framed screen extends above the height of the landing board so that entrance reducers are prevented from being pushed too far back into the hive.

In the winter, when the screen is removed, the entrance becomes taller. changing from 14mm to 21mm tall.

Note: A 14mm entrance height on my modified warré hives works out to a total entrance area around 40cm2. That's about three times the entrance area preferred by swarms looking for a home in the wild, however, 40cm2 is roughly equivalent to the entrance area found on a langstroth hive using a 3/8" high opening. Perhaps the large difference in feral vs managed entrances is based on the fact that it's not unusual for managed hives to reach a volume that is three times greater than that of the typical colony in a tree cavity?

As my intended mouse guard is just a piece of hardware cloth wedged into the entrance, I suspect the 21mm tall winter opening will allow the bees more room to navigate the tiny gaps of the hardware cloth.

Visual patterns

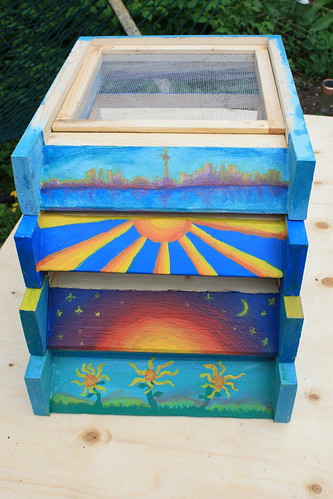
pile of bottom boards
The above photo shows a stack of the first four entrances I built. I painted each landing board with a unique visual pattern in the hopes that it would help the bees in recognizing their own hive and therefore reduce the drifting of bees between different hives. This was inspired by the concepts discussed in Tautz's book The Buzz about Bees: Biology of a Superorganism. The idea is that unique patterns are more useful to bees than simply painting each hive a different solid colour.

Tips. The bees won't care if the designs are as ornate as those in the photo above. Simple variations will do. The key differences, from top to bottom, between the pictured bottom boards are:

  • A horizontal line with lots of vertical lines
  • A small semi-circle on the upper edge with some radial lines
  • A big semi-circle on the lower edge
  • Three circles with a few horizontal, vertical and radial lines

Other uses for the framed screen

The framed screens may also be used to serve other purposes. For example, if I want to over-winter a weaker hive stacked on top of another colony, I can place the framed screens from both colonies between each other like one might ordinarily do with a double-screen board.

Testing it out

I've added these to 5 hives for the 2015 season. I'll update here once I decide if the experiment was a success or a failure.

tray of dead winter bees

Link

Greg Hunt on breeding hygienic mite-biting honeybees

Video of Dr. Greg Hunt of Purdue University, Dept. of Entomology speaking to the Southeastern Indiana Beekeepers Association. He talks a little about pesticides, but what really caught my interest is that he's been selectively breeding for bees that will chew the ankles of varroa mites.

His experiences seem to suggest that finding mites with chewed off legs on the bottom board may correspond to hygienic behaviour in honeybees. After selecting for this behaviour, very few of his colonies require mite treatments.

The problem with waps is they do like to feed on bees, larvae and honey

Yellow jackets can be very persistent in wanting to enter the hive, but the bees are usually a little ahead of them in building up their numbers and are able to defend the hive entrance.

If the hive is a little weaker or you find many wasps are easily gaining access to the hive (I wouldn't worry about the odd occasional wasp briefly sneaking in), you might consider reducing the entrance down to make it easier for the bees to defend.


In situations where it feels like a hive is really under attack, or it becomes impossible to perform inspections without large gangs of wasps appearing, wasp traps can gradually reduce the wasp numbers around your hive. I'm not proud of this, and dislike using them, so it's only something I've used reluctantly in situations where I felt it would prevent bees from suffering.

The trap in the video above is simply a water bottle top cut off and placed back into the bottle upside-down. This creates a funnel entrance into the center of the bottle. Any wasp that enters will have difficulty finding this entrance again. As the transparent bottle lets light in through the sides, this is where they search for an exit.

The bottle can be baited with a fermenting sugar or meat so wasps will be attracted but not bees.

Link

The kiwimana Buzz Beekeeping Podcast

A Beekeeping Podcast from New Zealand. They've been rather prolific in putting out a large number of episodes on a wide variety of topics in a short time period.

Of their current episodes, the interview with Rany Oliver has caught my attention. It was interesting to hear him talk about how he is able to do so much research and make the information free for the public as well as his thoughts on varroa managment and treatment-free beekeeping:

They also reviewed my own top ten list of considerations for aspiring urban beekeepers in this episode starting at the 14:30 mark:


Link

Thomas Seeley on honeybee communication - The Bee Hive as a Honey Factory

A presentation by Thomas Seeley where he outlines a few different communication signals used by the bees to effectively and efficiently distribute the number of bees taking on different tasks in honey making.

Here is a quick overview:

Shake signal - Tells bees in the hive that they need more foragers.

Waggle dance - Informs bee about where to find nectar

Tremble dance - Communicates a need for more bees in the hive to work at collecting and storing the nectar brought in by the foragers.

The beep signal - If bees that are Tremble dancing encounter waggle dancers they may give them the beep signal as a way of letting them know they should stop.

1

What a mouse in a hive looks like

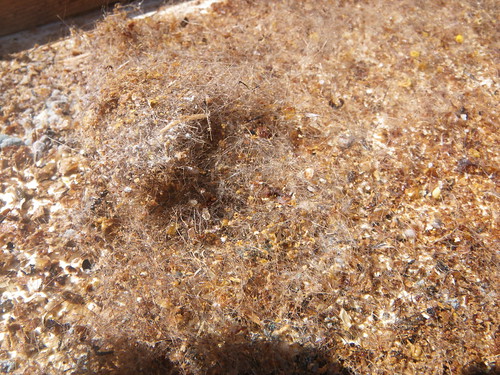
Once a mouse enters a hive they typically chew out the bottom corner of a few frames to make space. They will then bring in nest material. This is a view from the bottom of the box:

Mouse nest viewed from bottom of hive box.

You will probably see evidence of the nest on the bottom board as well.

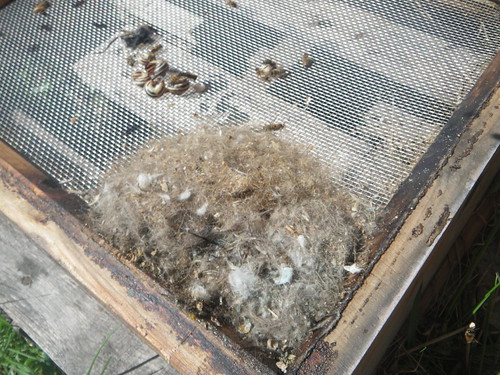
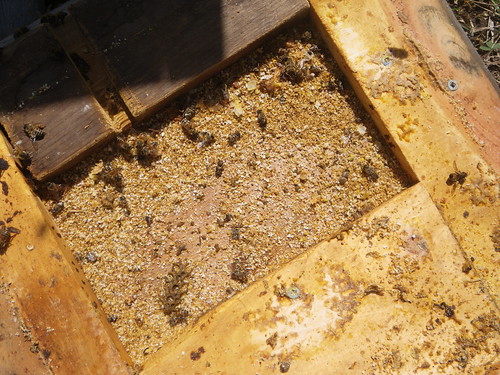
If you are using a screened bottom board, there is a good chance you can determine if you have a mouse just by looking at the tray under the screen for mouse droppings and fallen nest material.

Signs of the mouse nest under the screened bottom board

It's said that mice will often move out as it starts to warm up and the bees become more active. If not, the bees can attack the mouse and you may find the remains (possibly propolized) within the hive.

Aside from the damage to comb, mice are also problematic in the pungent stench of urine that they leave behind in the hive.

Evidence a shrew has been around the hive

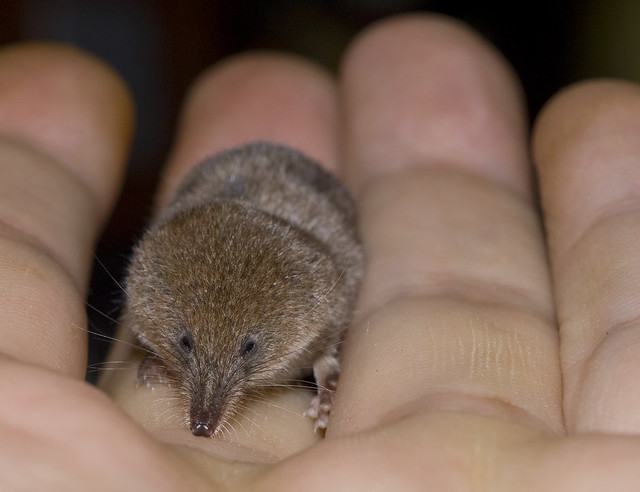
Pygmy ShrewPhoto by: minipixel / CC: Attribution-NonCommercial-NoDerivs License

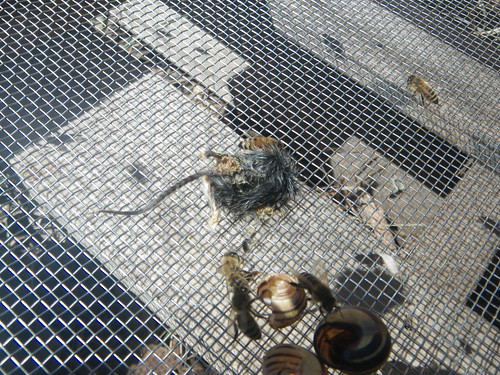
Shrew's don't nest in the hive, but they do leave behind signs of their visit. You may find droppings that are slightly different than those of mice. There will also be bee carcasses. Shrews eat the bee innards and leave behind a hollow exoskeleton. Most often they get at the innards via removing the head of the bee.

Shrew eaten bee carcass

If you do successfully exclude shrews from your hive, you may still find these decapitated dead bees outside the hive. It seems like they will feed on either the dead bees taken out by the undertaker bees, or those bees that leave the hive to die. Shrews are small but they need to eat frequently, over the course of a winter they can take a significant toll on the bee population.

Shrew and Mouse excluders

Generally the standard wooden entrance reducer is not sufficient for excluding mice, there are many stories of the wood being chewed away to enlarge the opening.

For a few years I've seen good results from both simply adding nails to standard entrance reducers and cutting myself thicker wooden entrance reducers from 1.5" wide wood. Was I just lucky?

Entrance reducer made from a wide piece of wood.

It's very popular to make or purchase metal excluders with holes drilled into them.

Installing mouse exclosuresPhoto by: Tie Guy II / CC: Attribution-NonCommercial-ShareAlike License

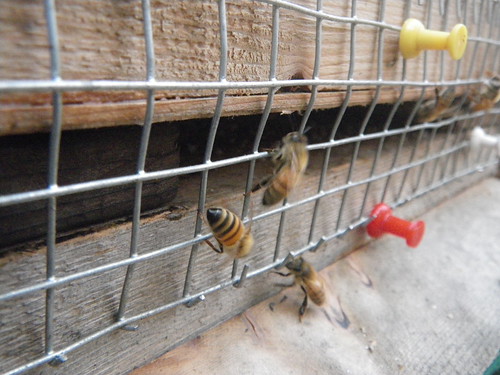
The use of hardware cloth as a mouse excluder is not uncommon either.

Hardware cloth to keep mice out of a beehive

Size of entrance required to exclude mice and shrews

The openings beekeepers use for a mouse excluder are sized between 1/4" (6.35mm) and 1/2" (12.7mm), with commercial products typically using a 3/8" (9.25mm) diameter circle. 

There's a fine line between leaving enough space for adequate ventillation, allowing bees to remove the dead, and to bring pollen in during the early spring, while still securely preventing mice from entering. There's lots of debate as to whether a 1/2" gap is sufficient to keep the mice out versus 1/4" making it too difficult for the bees to do everything they want to do.

As far as the 1/2" camp goes, there are some beekeepers who claim to have not had a problem in 40 years. There's also some references from mouse owners using 1/2" mesh cages for adults (but many in the mouse world do seem to cite needing 1/4"). Are their regional differences, like species of mice, as well as how likely it is to find smaller, younger mice at the time of winterizing, your hive?

I haven't found as much info out there about shrews. There is reference online to Fletcher Colpitts, Chief Apiary Inspector of New Brunswick citing the use of both 1/4 and 3/8" spacing for winter and then switching to 1/2" once there is spring pollen. Anecdotally, I can say I am finding beheaded hollowed out bees this year outside, but not inside of the hive in the photo above which is using 1/2" mesh with the vertical opening height made slightly smaller as it overlaps the wood of the hive. I take that to be a positive sign.

Link

The truth about thousands of years old unspoiled ancient Egyptian honey

This is an oft repeated story printed by seemingly credible publications and told by innumerable beekeepers and honey lovers around the world. It's a shocking statement that lends honey an almost magical mystique, but is there any truth behind it? Well in her blog post K Cummings Pipes took about as thorough a look into the matter as can be found on the internet.

For the full story check out her blog. If you just want me to make a long story short and spoil all the fun then keep reading.

In 1923 National geographic published photos at the tomb of Tutankhamen. One of the photos was just a bunch of kids munching on sugar cane. The description of this photo referenced 3,300 year old honey found in the tomb of Yuaa and Thuaa. Pipes found two books that referenced this honey finding incident at Yuaa and Thuaa's tomb. I'm sorry to say that though they did initially identify something as honey, it turned out to be a substance called natron.

Is may not be true but does that make honey any less magical? I don't think so. A bouquet of concentrated flower juice, that lasts, if not thousands of years, longer than most food products, is still pretty amazing all on its own as far as I'm concerned.

I did try searching a little more on my own. I found some mentions of a Georgian honey. Each report stated how it's older than the Egyptian honey. In one case there was claim about the specific types of honey found. Some mentioned multiple 'jars' being found, while others say 'traces' of honey were found. No mention of edibility anywhere. So maybe there is still hope of an ancient preserved honey?

To maintain the quality of your bees wax, here's a few things to be aware of when melting:

Temprature

Heating the wax to tempratures above 85ºC (185ºf) may discolour it. The melting point of beeswax is 62-65ºC (143 - 149ºf). If melted in water at excessive tempratures, hot steam can cause partial saponification and ruin the wax

Water type

Melting in soft water (like rain water) if preferable. Acidifying the water with something like 0.1 % vinegar can protect the wax.

Container material

wax heated in a container made with iron, brass, zinc and copper in it may cause a reaction that will discolour the wax. Stainless steel, aluminum or enameled steel, tempered glass & ceramic pots should be okay.

Link

The Monk and the Honeybee

A documentary on Brother Adam's the world famous breeder of the Buckfast bee. Filmed for the BBC in 1987 when Brother Adams was 89.

The film goes into some of the history of developing the buckfast strain of bee, gives a taste of life in their apiary, and documents the search for the Monticola in Africa which was to be added into the genetic mix of the buckfast.